Using CloudFlare for websites and Applications is one of the most intelligent decisions that you can take towards the security and performance for your app. This article discusses how to Configure Cloudflare for the best performance of blogging sites.
What Is CloudFlare ?
CloudFlare is a Jack of all, and master of many :). Some of the offerings of Cloudflare is the following.
DNS provider
Once you add a site to Cloudflare, it will ask you to change the name servers of the site to the CloudFlare ones, so that CloudFlare takes over the DNS. Cloudflare DNS is one of the fastest and you can surely trust them for performance. There are millions of websites using Cloudflare DNS.
The DNS management is provided for free by CloudFlare to anyone.
Reverse proxy
You can enable reverse proxy for your web apps at the DNS manager, by clicking the CloudFlare icon. by enabling it, only the CloudFlare will know the real IP of your web applications, and the rest of the world will be communicating to the Cloudflare, and Cloudflare will fetch the data for you.
Content Delivery Network
You can enable caching for the content, and when an asset is requested, Cloudflare look for the cache in their servers, and if it is available, it will deliver the cached content, so that the request will not reach your site.
This caching is completely governed by the cache control headers provided by your site. So unless you have the proper caching plugin enabled, you cannot make sure that Cloudflare caching works as expected.
Security Provider
Paid plans of Cloudflare comes with Web application security and advanced firewall where you can block countries and IPs and networks from accessing your application. The Analytics is awesome, and I have seen CloudFlare easily mitigating attacks of the magnitude of billions of requests per second.
Their Argo, LoadBalancer, Page rules etc are worth mentioning.
DDoS mitigator.
At any point, you can enable the ” I am under attack ” and Cloudflare will help to mitigate a DDoS attack on your application.
How to enable CloudFlare for a website
1. Sign up to CloudFlare using an email ID and password
2. Login to Cloudflare with above steps
3. On the right top, Click on Add Site
4. Enter the domain name, and then wait for a few minutes. Cloudflare will go and fetch the DNS records, You need to make sure that all your domain and subdomain entries have been migrated. Otherwise, some part of your site may go down after the next step.5. Change nameservers of the domain name to the ones that are provided by Cloudflare.
How to Configure CloudFlare
It could be tricky at times to configure Cloudflare, but once it is configured properly, you can offload almost all your static content to Cloudflare, and then your server will be handling only the application server.
It will also provide a free SSL certificate for life. For your configuration to work, you need to enable the Cloudflare icon in the DNS area, so that the DNS requests will go through the Cloudflare.
Crypto
If you have an SSL certificate installed, Select Full in the SSL area or else flexible.
Then you need to enable Always use HTTPS. You can also enable ” Automatic HTTPS Rewrites “so that your site will not show the mixed content warning.
Speed
I Usually enable Auto to minify for all three, Javascript, CSS and HTML and then enable Rocket Loader, and brotli.
Caching
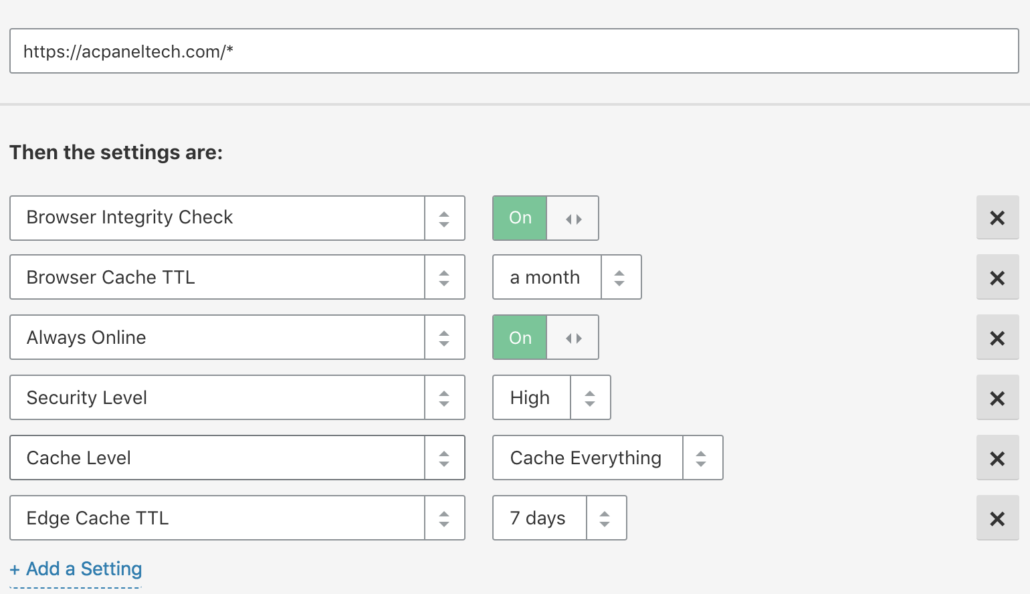
I usually set the caching level as standard, browser cache expiry to 1 month. Always online is ON.
Page Rules.
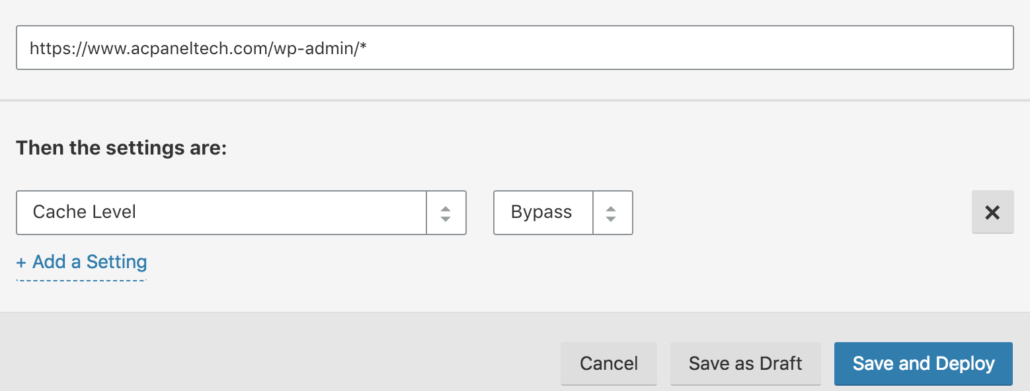
Please read and understand carefully the following two-page rules.
Do not cache the wordpress admin area.
How to test If Cloudflare is working
To check if a site that you have added to Cloudflare is working OK, You need to look at the headers of the site.
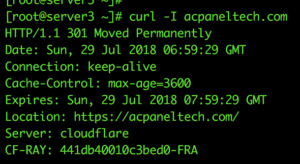
I am taking an example of this site itself. If you look at the headers if the nonsecure site, you can see these.
You can see that the “Server: Cloudflare ” and the CF-RAY is FRA. It means that the Cloudflare is handling the non-https requests and , is handles by a server at FRA (Frankfurt, maybe ) .
The response is 301 and the redirect location is https://acpaneltech.com . So the non-https site is correctly redirecting to the https site.
How we will look at what is happening to the https site. I am keeping the development mode on, so that the Cloudflare won’t cache anything with them, and then disable development mode and then give you the differences.
Now the things are a bit different.
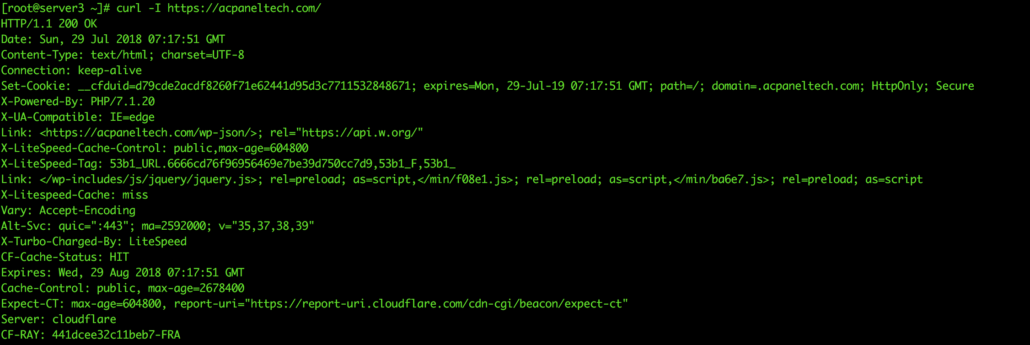
Server and RAY is the same, it means that the site is being served by Cloudflare and from the same server, but the response code is 200, and it says the PHP version ( oops! I need to disable it ) and it says that the Litespeed cache is hit and is served by litespeed web server.
Cloudflare sets a cookie so that it can track the requests and keep the cookie to enable sessions.
==
Set-Cookie: __cfduid=d3caf2792fb494363919c00cf3b11ccc71532848073; expires=Mon, 29-Jul-19 07:07:53 GMT; path=/; domain=.acpaneltech.com; HttpOnly; Secure
===
Now I am going to disable the Cloudflare development mode.
Now things are more Clear. Cloudflare has added a few more headers, and it means it is doing more thank just bypass requests.
===
CF-Cache-Status: HIT
Expires: Wed, 29 Aug 2018 07:17:51 GMT
Cache-Control: public, max-age=2678400
===
Now the site is being served by Cloudflare, and the web server is not handling it. Unless the cache is purged at Cloudflare, the requests will be handled by Cloudflare.


[…] The first step to set up a server for WordPress Hosting would be to spin up a Server from Digital Ocean or Vultr or Linode and prepare. Once you have completed the steps, you can proceed to configure the website to use Cloudflare. […]